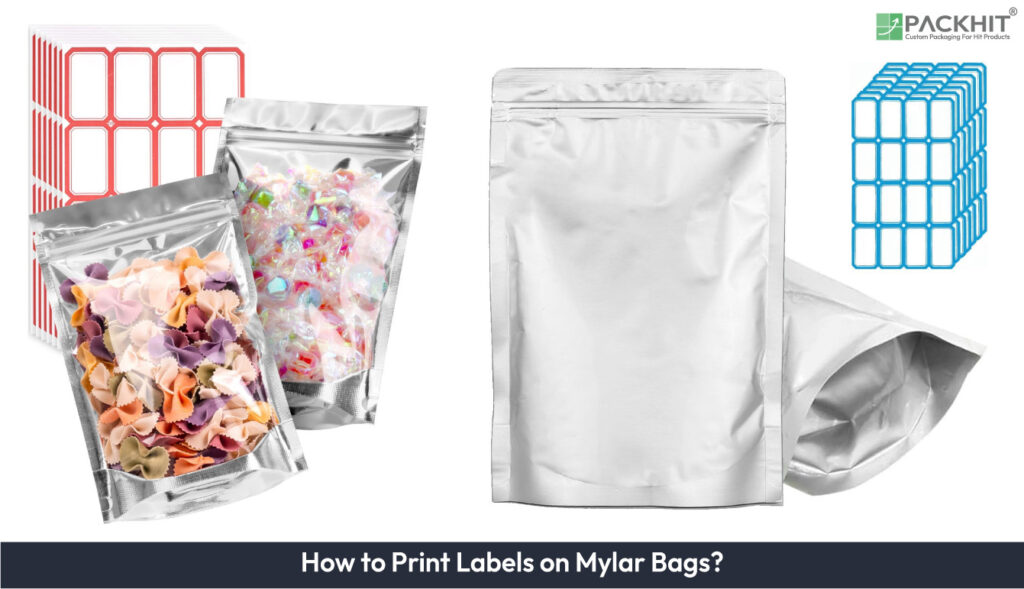
Printing labels on Mylar bags requires matching the label material, adhesive, ink, and printer to the bag’s surface and service conditions. The process includes defining temperature, moisture, solvent, abrasion, barcode, and regulatory requirements; selecting PET, PP, or vinyl stock; preparing artwork; and cleaning or treating the surface for reliable wetting. Thermal-transfer resin, UV inkjet, flexographic, laser, and screen- printing methods suit different run lengths and durability requirements, with overlamination or varnish added when protection is required. Apply labels with controlled pressure, allow adhesive dwell time, then verify peel strength, ink cure, abrasion resistance, solvent resistance, barcode readability, and environmental performance.
For most Mylar bags, choose a PET label face stock with acrylic adhesive because it resists solvents, UV exposure, and packaging temperatures. Use BOPP for lower weight, high-tack or solvent acrylic for metallized films, and cryogenic or heat-stable adhesive when storage falls below -20 °C or rises above 80 °C. Select resin-transfer ribbons or UV-cured pigment inks when abrasion and solvent resistance matter.
To print labels on mylar by specifying conditions, choosing compatible face stock/PSA and print chemistry, cleaning/treating the surface, setting printer and finishing parameters, applying with controlled pressure, and validating adhesion with peel, abrasion, and solvent tests.
- 1.Specify Conditions and Acceptance Tests
- 2. Select Materials
- 3. Provide Artwork
- 4. Prepare the Surface
- 5. Set Up the Printer
- 6. Add the Finish
- 7. Apply the Labels
- 8. Validate Adhesion
- 9. Troubleshooting
- Which Printing Technologies Suit Mylar Bags for Printing Labels?
- Which Label Face Stocks and Adhesives Best Match Mylar Bags?
- When to Choose Direct Printing on Mylar vs Adhesive Labels?
1.Specify Conditions and Acceptance Tests
Record the pouch service conditions, acceptance tests, and regulatory requirements before printing. State a typical temperature range, such as −20 °C in a freezer to 40 °C in storage; the range may vary by product. List exposures such as outdoor UV hours and salt spray, along with contact with solvents, oils, or food. Record the expected lifetime in months or years and attach required certifications or declarations. Define measurable criteria, including the test method, a typical 180° peel test, a pass threshold such as X N/25 mm, a barcode read rate such as ≥95%, and solvent-rub limits. These values may vary by pouch material and use.
2. Select Materials
Choose a face stock, adhesive family, and print consumables that match the bag and use conditions. Face stocks include polyester (PET), polypropylene (PP), and vinyl (PVC). Adhesives include acrylic, rubber-based, and silicone types. For outdoor use or solvent exposure, use polyester with solvent acrylic or high-tack acrylic PSA. For thermal-transfer printing, use resin ribbons. For full-color rollstock, use UV-curable pigment inks and primer, if needed.
3. Provide Artwork
Provide press-ready files at the final delivery stage. Use CMYK or spot colors at 300 dpi at final size. Convert fonts to outlines and flatten transparencies. Add a typical 2–3 mm bleed beyond the cut line; this range can vary by printer and finishing method. Use GS1 barcode modules and keep the required quiet zones. Set reversed sans-serif type at a typical minimum of 6–8 pt; this range can vary with the label size and print process. Include trapping or knockout rules and press dot-gain targets, with a typical flexographic range of 20–40% after linearization; this range can vary by press and material. Add registration marks and color bars for rollstock or inline finishing.
4. Prepare the Surface
Clean the label area and raise its surface energy, if needed. Wipe it with 70–90% isopropyl alcohol on a lint-free cloth, then let it dry for 2–5 minutes. Check wetting with dyne pens or a contact-angle instrument. A typical target is about 38 mN/m or higher, but the range can vary by film and ink. Use corona or low-pressure plasma to raise the dyne level by about 5–15 mN/m, if it is low. Repeat cleaning and testing when oily residue remains.
5. Set Up the Printer
Test representative mylar material with several settings, then record the settings that meet density and durability requirements. For thermal-transfer printing, use a resin ribbon and test at a typical 203–300 dpi range, which can vary by artwork and equipment. Adjust print-head energy and speed in small steps until the print has the required density and edge definition. For UV inkjet printing, adjust ink laydown and curing until the ink is fully cured. Check this with a tactile tack test. For flexographic printing, set corona power and linearize the inks with press curves. Record the speed, anilox, and chamber settings for repeatable runs.
6. Add the Finish
Protect the printed surface and complete die-cutting before application. Use a clear polyester or polypropylene overlaminate for abrasion and UV resistance. Apply spot or flood UV varnish for scuff control, if it is compatible with the next process. Die-cut or kiss-cut the labels to match the applicator registration. Set kiss-cut tolerances and rewind tension to limit edge lift. Select a matte or gloss finish based on handling and appearance requirements.
7. Apply the Labels
Apply labels by hand or with an applicator using steady pressure and a controlled peel angle. A typical peel-angle range is 30°–90°, but the range can vary by label construction and equipment. Keep placement within about ±1–2 mm for critical registration, although the tolerance can vary by the package and artwork. Use a firm squeegee stroke by hand to remove trapped air. Allow 24–72 hours for the adhesive to reach its full bond, with the dwell time varying by adhesive and storage conditions. Test initial tack when the bags ship sooner.
8. Validate Adhesion
Use acceptance tests that match the bag’s service conditions. Run a 180° peel test after 24 hours. Check abrasion with a typical Taber test, such as CS-10 at 500 cycles, although the wheel and cycle count can vary by the specification. Check ink resistance with a typical MEK double-rub test of 50 passes, with the count varying by the ink system. Scan barcodes, if used, and set a typical minimum read rate of 95%, which can vary by the application. Run environmental cycles that represent use, such as 40–75% relative humidity and −20 °C to 40 °C. Reject labels that show visible lift or ink flaking after testing.
9. Troubleshooting
Match each failure to its likely cause, then apply the related correction.
- Edge lift: Contamination or low surface energy can loosen the label edge. Clean the bag with IPA, apply corona or plasma treatment, or use a high-tack solvent acrylic adhesive.
- Print smears or uncured ink: Low UV exposure or incorrect ribbon and ink chemistry can cause smearing. Increase the UV dose, test a resin ribbon for thermal transfer, or add a clear overlaminate.
- Wrinkling or delamination: Excess application heat or a mismatch in thermal expansion can separate the label. Lower the process temperature, select compatible face stock, and let the bag reach room temperature before application.
- Poor barcode read: Low contrast or an incorrect module size can prevent scanning. Increase print density, check the GS1 module dimensions, print at a higher resolution, and repeat the QC scan.
Which Printing Technologies Suit Mylar Bags for Printing Labels?
Thermal transfer with resin ribbons and UV-curable industrial inkjet are suited to durable label printing on mylar when the specified ribbon, surface treatment, and curing conditions are met. Laser printers and common aqueous desktop inkjet printers require protective over lamination for solvent and abrasion resistance.
The table given below shows printing methods for labels on mylar bags and compares compatibility with PET, durability, typical run‑length, and best use cases.
| Method | Compatibility with PET | Durability | Typical run‑length | Best use cases |
| Thermal transfer (resin ribbon) | High. Works on PET label stock. | High abrasion and solvent resistance when printed with resin ribbons. | Short to medium runs; efficient for variable data. | Durable barcodes, serial numbers, small-batch production. |
| UV inkjet (industrial) | High after corona treatment or primer. | High once fully UV cured; resists outdoor exposure and mild solvents. | Short to long runs; digital flexibility for variable graphics. | Full-color roll-to-roll jobs, short runs with versioning. |
| Flexography (water or UV inks) | High with press pretreatment and controlled surface energy. | High when using UV inks plus varnish or laminate. | High-volume runs; cost-effective at scale. | Large batches where unit cost and throughput matter. |
| Laser (toner) | Moderate. Fusing heat can affect thin PET films. | Moderate. Toner resists abrasion but not strong solvents. | Short to medium runs; convenient for office-level production. | Small-batch text labels and prototypes with no solvent exposure. |
| Screen printing | High. Allows thick ink deposits on PET surfaces. | Very high mechanical durability and tactile ink layers. | Medium runs where specialty inks justify setup. | Heavy-ink graphics, metallics, and specialty coatings. |
Specific print-material pairings: thermal-transfer resin ribbons plus polyester face stock support solvent and abrasion resistance. UV-curable inks on treated mylar provide full-color prints that can be handled immediately after proper curing. Pigment-based piezo inkjet on primed PET with overlamination gives good indoor durability.
Which Label Face Stocks and Adhesives Best Match Mylar Bags?
Polyester (PET) face stock with acrylic or solvent-acrylic PSA fits most mylar bags. It resists solvents and UV exposure. Use high-tack acrylic for metallized films or other low-surface-energy films. Use cryogenic acrylic for service below -20 °C; the actual temperature limit can vary by product and test conditions.
- PET face stock: Choose gloss polyester for solvent resistance, UV stability, and thermal compatibility with BoPET mylar bags.
- PP face stock: Choose BOPP for lower weight and cost; solvent resistance is generally lower than PET.
- Vinyl face stock: Choose PVC for curved surfaces and higher friction; recyclability varies by material.
- Acrylic adhesive: Choose solvent acrylic for aging and UV resistance. Choose high-tack acrylic for metallized or low-surface-energy films, especially below about 38 mN/m.
- Rubber adhesive: Choose synthetic rubber for high initial tack on short-term labels; solvent resistance is limited.
- Silicone adhesive: Choose silicone PSA for sensitive surfaces and low residue; shear strength is limited.
- Temperature: Choose cryogenic acrylic below -20 °C and heat-stable adhesive above 80 °C. Confirm limits with the adhesive specification and process test.
- Print durability: Choose resin-transfer ribbons or UV-cured pigment inks if labels face abrasion or solvents.
When to Choose Direct Printing on Mylar vs Adhesive Labels?
Choose adhesive labels for short runs or late-stage variable data. Choose direct printing for large runs with stable artwork if press setup and uptime support the lower unit cost.
Compare run length, SKU changes, durability, and lead time. Typical examples include 100, 1,000, or 10,000 units; three SKUs or 20 SKUs per year; abrasion or solvent contact; and same-day changes or press setup days. These ranges can vary by equipment, material, and supplier.
- Run length: Adhesive labels often cost less for jobs below a typical range of about 5,000 units. Direct printing can cost less above that range, if press setup and uptime support the run.
- SKU variability: Use adhesive labels for frequent artwork changes or late-stage text, lot, and date changes. Use direct printing for stable artwork across large batches.
- Durability: Choose direct printing or polyester face-stock labels with resin-transfer ribbons or UV-cured inks and an overlaminate, if the bag faces abrasion or solvents.
- Placement: Choose direct printing for repeatable registration on rollstock. Choose labels if a typical placement tolerance of ±1.5–5 mm can be accepted and the applicator handles pouch variation.
- Lead time: Choose adhesive labels for late data changes or to avoid press changeovers. Choose direct printing if press runs can be scheduled with setup time.
- Equipment: Choose adhesive labels if capital is limited and handheld or basic applicators are sufficient, such as handheld or tamp-blow units. Choose direct printing if the operation includes flexographic, UV inkjet, or high-throughput thermal-transfer equipment.
- Material use: Choose direct printing if reducing extra label material and adhesive waste matters for packaging disposal.
Match the method to cost, flexibility, or durability. Confirm the choice with a typical pilot run of 100–500 parts, a range that can vary by SKU and process. Test adhesion, abrasion, and barcode scans before full production.