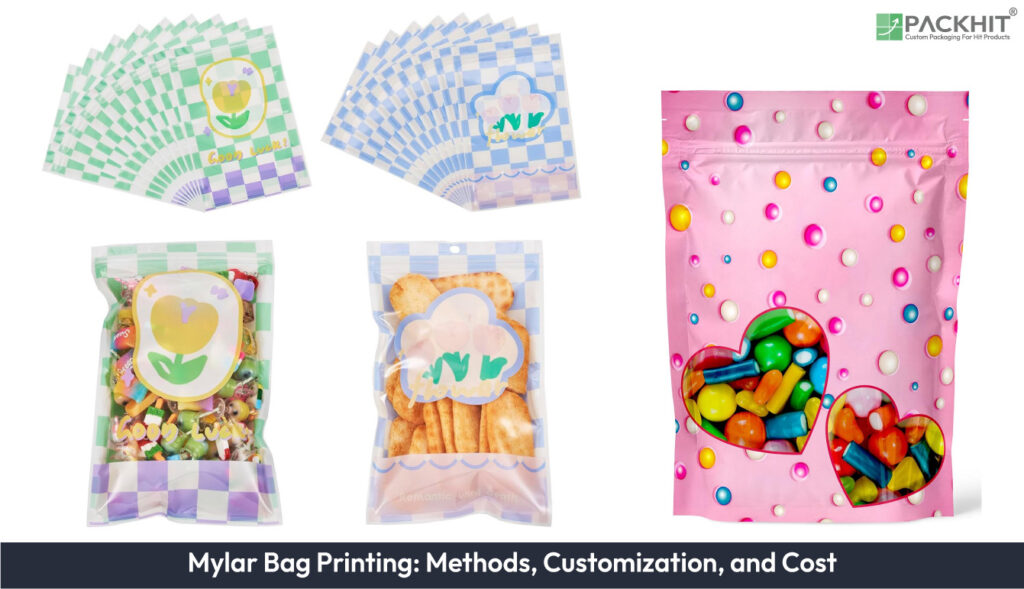
Mylar bag printing uses multiple printing methods, including flexographic, rotogravure, digital, screen, and offset processes, with cold foil or hot stamping for metallic details. Flexography handles medium and long runs, while rotogravure suits large photographic orders with fine continuous-tone images. Digital printing removes plate costs and supports short runs, variable artwork, testing, and serialized packages. Screen and offset printing address thick opaque effects, tactile coatings, small text, and detailed linework. Customization of Mylar bags covers artwork, CMYK or spot colors, white underprint, gloss or matte finishes, pouch structure, closures, and print coverage. These choices affect ink use, tooling, setup time, and unit cost. Die-cut windows, hang holes, embossing, varnish, overlamination, foil, zippers, valves, and spouts add processing steps and require register, seal, and leak checks. PET supports printing, aluminum adds barrier protection, nylon resists punctures, and PE or CPP forms the heat-seal layer. Digital proofs verify color, barcodes, seals, and trim before production. Selecting a Mylar bag printing method depends on several factors, including order size and quantity, artwork detail, color coverage, and setup costs.
- Which Printing Methods are Used for Mylar Bags?
- Flexographic Printing
- Rotogravure (gravure) Printing
- Digital Printing (inkjet and LEP)
- Screen Printing
- Offset Lithography
- Cold Foil and Hot-Stamping (Metallic Finishes)
- How Does Customization Shape Mylar Bag Printing?
- How Do Die-Cutting and Finishing Techniques Affect Mylar Bag Function and Cost?
- How Do Mylar Bag Printing Methods Compare by Order Size and Artwork?
- How to Choose the Right Printing Method for Mylar Bags?
Which Printing Methods are Used for Mylar Bags?
Flexographic, rotogravure, digital (inkjet/LEP), screen, and offset are the principal printing methods; cold-foil and hot-stamping supply metallic effects as finishing operations.
Flexographic Printing
Flexographic printing uses flexible polymer plates and fast-drying inks for high-speed runs. It suits medium-to-long runs and prints well on PET printable faces in PET/AL/PE or PET/NY/AL/CPP laminates. Ink types include solvent-based, water-based, and UV-curable inks, with a white underprint used for metallized areas. Typical uses: solid spot colors, repeat artwork, and inline varnish (examples: brand solid panels, barcodes).
Rotogravure (gravure) Printing
Rotogravure printing uses engraved cylinders to reproduce continuous tone and fine detail at very high speeds. It suits very long runs, typically 50,000+ units, and yields low per-unit ink cost for photographic artwork. Gravure inks are formulated for flexible films and low migration, where food-contact compliance is required. Typical uses: long-run photographic panels and high-coverage backgrounds (examples: product photography, gradated backgrounds).
Digital Printing (inkjet and LEP)
Digital printing (UV inkjet, water-based inkjet, and liquid electrophotography/LEP) prints without plates and supports versioning and short runs. It suits short to medium runs and variable data work; presses accept pretreated PET faces or films with surface treatment. Use overprint varnish or lamination for abrasion resistance and specify ink type for migration limits in food applications. Typical uses: SKU testing, short-run launches, and serialized packaging (examples: batch codes, variable artwork).
Screen Printing
Screen printing deposits thick, highly opaque inks and coatings for spot effects and tactile finishes. It suits low-to-medium runs and localized applications that require heavy ink laydown or special-effect inks. Use screen printing for raised varnish, security marks, and heavy white underprint on foil windows (examples: raised logo varnish, metallic ink pads).
Offset Lithography
Offset lithography transfers ink via plate and blanket to a substrate for fine-detail reproduction on treated films. It operates economically on medium runs where high-resolution text and linework are required, and the film surface has been corona or plasma treated. Offset often precedes lamination and requires ink/film compatibility checks for sealing. Typical uses: detailed copy, small type, and tight-line artwork (examples: ingredient panels, legal text).
Cold Foil and Hot-Stamping (Metallic Finishes)
Cold foil and hot-stamping apply metallic leaf or foil as post-print finishing operations. They function inline or offline to add metallic accents without full metallized substrates; they require additional stations, adhesive or heat dies, and increase per-unit cost. Use metallic finishing for brand highlights and security features (examples: foil logos, decorative accents).
How Does Customization Shape Mylar Bag Printing?
Customization determines the printed appearance, information, and production cost of a Mylar bag. Manufacturers select the bag size, film color, artwork, ink colors, finish, closure, and print coverage before production begins.
- Artwork: Supply vector logos, product names, instructions, barcodes, and regulatory text at the printer’s required resolution.
- Color: Specify CMYK, spot colors, or metallic inks. A white ink layer keeps artwork visible on silver or transparent film.
- Finish: Choose a gloss, matte, or soft-touch surface. Matte film reduces glare, while gloss film produces a brighter printed appearance.
- Structure: Select a stand-up pouch, flat pouch, side-gusset bag, or rollstock format based on filling equipment and product volume.
- Closure: Add a zipper, tear notch, hang hole, or child-resistant feature, if the product and applicable packaging requirements call for it.
Print coverage also affects cost. A small front-panel design uses less ink and may require fewer production steps than full-surface printing on both sides. Metallic film, spot colors, special finishes, custom tooling, and low order quantities can raise the unit price. Request a digital proof before production to check color placement, text size, barcode readability, seals, and trim areas.
How Do Die-Cutting and Finishing Techniques Affect Mylar Bag Function and Cost?
Die-cutting and finishing change pouch function and cost by adding fixed tooling and per-unit operations that alter barrier performance, seal integrity, printed-surface protection, and final appearance.
Key finishing categories and their effects:
- Die-cutting: creates custom shapes, windows, and hang holes (examples: viewing windows, Euro hang holes). Requires steel-rule die tooling and tight register control. Tooling is a fixed setup cost amortized across the run; typical die-cut cost ranges from a few hundred to a few thousand USD. However, die cut and finishing costs vary by supplier, tooling, material, and order quantity. Cut windows remove barrier material and reduce light/oxygen protection; add a welded film patch or use a clear window film (examples: PET/AL/PE with welded PET patch) if barrier must be maintained.
- Cold-foil and hot-stamping: apply metallic leaf or foil for localized accents (examples: foil logos, metallic trims). Cold-foil uses an adhesive transfer on the web; hot-stamping uses heated dies and metallized ribbon. Both add machine stations and per-unit finishing cost. Hot-stamping heats the web; perform hot-stamping before final lamination if high temperatures would affect the sealant layer (examples: PE or CPP), or specify heat-tolerant sealant polymers.
- Lamination and overlaminate: bonds films or adds a protective top layer (examples: gloss PET overlaminate, matte CPP overlaminate, common stacks PET/AL/PE and PET/NY/AL/CPP). Laminates place printed ink between films for abrasion protection and increase total thickness (typical target 70–180 µm). Choose solventless, solvent-based, or hot-melt adhesives by line speed and migration profile; lamination raises material cost and changes seal-bar temperature and dwell requirements.
- Varnish and coatings: apply surface protection or tactile finishes (examples: spot UV gloss, aqueous matte varnish, abrasion-resistant overprints). Varnishes change gloss, slip, and scuff resistance and reduce printed-panel abrasion on high-coverage art. Use food-contact-rated formulations for consumables and request migration-test data. Water-based and UV-cured coatings require compatible substrate treatment (examples: corona or plasma) for reliable adhesion.
- Embossing and debossing: produce tactile patterns and registered logos (examples: raised logo, textured panels). Requires metal tooling (steel or brass) and tight web registration. Embossing increases setup complexity and scrap risk if registration fails; plan embossing on laminated webs that include a printable PET face to retain fine detail and reduce yield loss.
- Feature insertion: integrates structural elements (examples: ziplocks, degassing valves, spouts). Each insertion adds per-unit labor and reduces line speed; spout and valve insertion require compatible sealant layers (PE or CPP) and pouch-former adjustments for slit width. Inserted features create potential leak or delamination paths; validate final pouches with seal-strength, peel, and leak tests under production conditions.
Material and structural interactions: PET contributes mechanical strength and printability, AL adds light/oxygen barrier, PA improves puncture resistance, and PE/CPP provides heat-seal layers; choose finishes that match the laminate stack (examples: PET/AL/PE, PET/NY/AL/CPP) to avoid seal failure or delamination.
Note: For food packaging, material selection, migration testing, seal performance, and compliance documents must be checked for the specific contents, contact conditions, market, and jurisdiction. Confirm the finished structure with the converter and an appropriate packaging or compliance professional before production or sale.
How Do Mylar Bag Printing Methods Compare by Order Size and Artwork?
The best Mylar bag printing method depends on order quantity, artwork detail, color requirements, laminate structure, and setup cost. As shown in the table below, digital printing fits short runs and multiple SKU versions, flexography fits repeat artwork with spot colors, and rotogravure fits long runs with photographic coverage. Screen printing and offset lithography address narrower specifications, such as opaque ink layers or highly detailed sheet-fed artwork.
| Printing method | Order size | Artwork and color use | Setup and cost pattern |
|---|---|---|---|
| Digital printing | Short to medium runs | Variable artwork, photographs, gradients, and multiple SKU versions | Low prepress setup; higher unit cost as volume increases |
| Flexographic printing | Medium to long runs | Repeat artwork, solid fields, line art, and spot colors | Plate setup adds an initial charge; unit cost decreases at higher volumes |
| Rotogravure printing | Long runs | Photographic images, continuous tones, and dense color coverage | Cylinder preparation creates a high initial charge; large quantities reduce unit cost |
| Screen printing | Small runs or selected print areas | Opaque spot colors, bold graphics, and specialty ink layers | Screen preparation limits speed and artwork complexity; ink deposits are comparatively thick |
| Offset lithography | Medium to long runs on printable sheets | Fine line detail, process colors, and continuous-tone artwork | Plate and sheet-lamination steps add setup work; the method fits specific bag constructions |
Manufacturers can choose the method by comparing the required quantity with the number of artwork versions, image detail, color coverage, and acceptable setup charge. For instance, a manufacturer ordering 500 Mylar bags across five designs usually compares digital printing first, while a manufacturer ordering 100,000 Mylar bags with one photographic design usually compares rotogravure and flexography.
How to Choose the Right Printing Method for Mylar Bags?
To choose the right printing method for Mylar bags, begin by comparing order size, artwork, bag material, product contact, and finish requirements.
- Order size: Select digital printing for short runs of up to 20,000 bags or for designs with variable names, codes, or images. Select flexographic printing for medium runs of about 5,000 to 200,000 bags. Select rotogravure printing for runs of 50,000 bags or more.
- Artwork: Choose digital printing for frequent design changes and full-color images. Choose flexographic printing for simple artwork and spot colors. Choose rotogravure printing for detailed images and smooth color tones.
- Film surface: Use a printable PET outer layer when the artwork sits on the bag surface. Use reverse printing between film layers when the laminate must protect the ink from scratches.
- Color base: Add a white ink layer under the artwork when the bag uses silver or other metallized film. This layer keeps colors clear and close to the approved artwork.
- Product safety: Place the ink between film layers or add a protective overlaminate when the print may touch the product or face rubbing. Use a PE or CPP sealant layer between the printed film and food.
- Material and bag style: Confirm ink adhesion with corona or plasma treatment if the printer uses water-based or UV inks. Request migration data and compliance documents for food packaging. Choose a laminate thickness of 70 to 180 microns and match the bag style to use, such as a stand-up zipper, side-gusset, or one-side-clear and one-side-foil bag.